
 |
| It was time for an update to the Aft Head, but will it meet the Admirals expectations. |
The bathroom or the "head" as it is referred to on a boat is one of the most used rooms onboard. It is not surprising that it is the most vulnerable to wear and tear. The head is also usually the smallest cabin on the boat, and it can feel mighty claustrophobic at times. If it is getting a bit dark and dingy it is probably feeling even more so and it's probably time to brighten up and refurbish. While you might be under the impression that your head is functioning fine, there are times that it sends you signals that it needs renovation. Recognising these signals and acting on them will make your onboard life more convenient and pleasant. While Our Dreamtime's Captain may not have noticed any real problems with the decor and been happy to close the door and ignore, the Admiral certainly was receiving an SOS from our heads loud and clear and was keen to embark on an overhaul. Being a great believer in "Happy wife = Happy Life" Rob had no problem backing the project, which was not a huge commitment by him when Karen said she intended to do all the work anyway.
Now speaking of signals, of course the worst message to get from your head is when nasties don't disappear out of the bowl the way they should when you flush. Managing that issue definitely falls into the maintenance category rather than refurbishment but should still be mentioned here. We've suffered this problem a number of times in the past and have learnt that these blockages in waste pipes on boats are almost always caused by calcification build up caused by sea water reacting with urine in the lines. The best way to avoid it easily is by ensuring you flush well so that ALL urine and solid waste makes it completely out of the pipe into your holding tank or out through the through hull into the sea if you're offshore and underway. We have electric flush toilets in both our heads and hold the button down for a long 15 to 20 second count after every use. Adopting this practice, combined with a regular flush through with a fresh water/white vinegar mix, we have eliminated blockages for the last couple of years - touch wood.
Refurbishment doesn’t need to break the bank. Mostly the work is DYI with a little bit of elbow grease and, we might as well say it, some occasional colourful language in our case. Even without a lot of knowledge about, plumbing, tiling, painting and cabinet making you can easily bring the head back to its original beauty or even beyond.
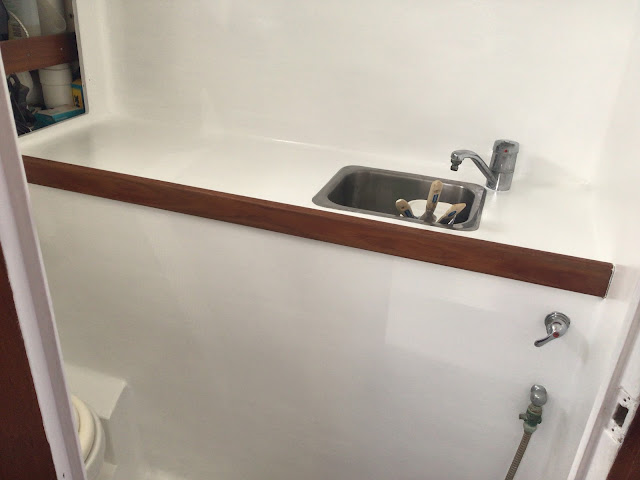
We have two heads on our boat but, not surprisingly, Karen's immediate focus was on the aft head in our master cabin as it's the one we use most. Firstly we stripped out all of the locker doors, mirror, hooks, heated towel rail and shower pan. Once all of this was removed a good clean of all surfaces with sugar soap removed body oils, soap scum and any other containments built up over the years. Next it was time to sand all painted and timber surfaces. We started with 180 grit ending with 240 grit. We used a combination of hand sanding and a cordless orbital sander. When everything was sanded it was time to clean all of the surfaces again.
 |
| First coat of waterproofing |
To increase the ventilation a solar powered extraction fan was fitted in the ceiling. This was one of the dearer items bought for the project but not only will it save on power usage, but being totally self contained, it also eliminated some unsightly wiring that had previously run across the ceiling to the previous unit which no longer worked anyway. The current timber framed red/white fluorescent ceiling light became wall mounted by the lockers. This removed more ugly wiring that previously ran across the ceiling. To brighten the room further, a new, rechargeable LED slim line light unit was placed above the sink. It also provides great illumination for the mirror position.
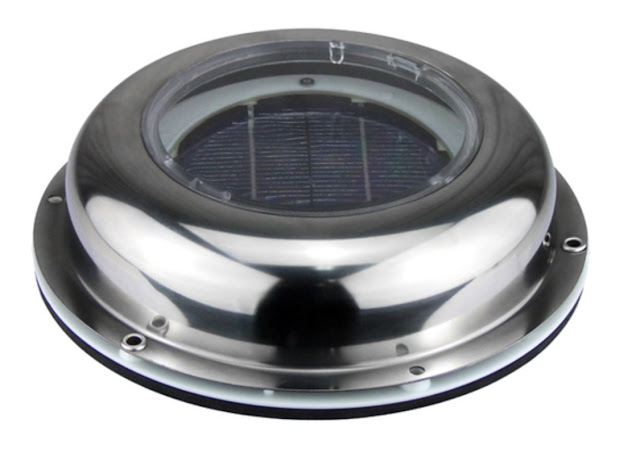 |
| These neat and tidy solar vents help keep the head ventilated |
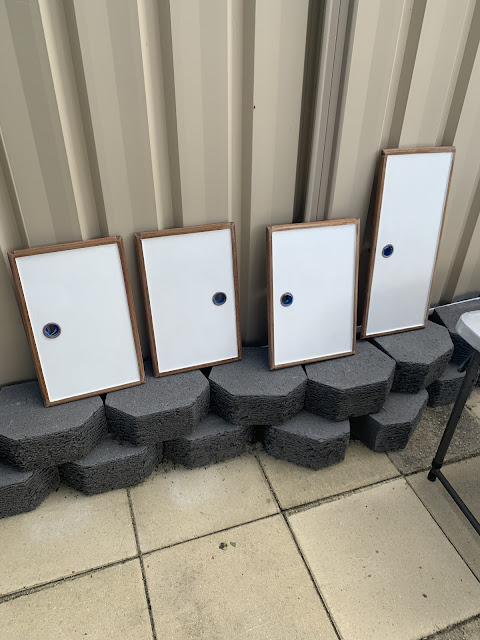
Being a boat project, of course the weather turned on us and we faced a week of rain. Thankfully we are currently tied to the marina dock and could take all of the locker doors etc to Karen’s parents' shed. Here we were able to sand, paint and varnish with no chance of rain spoiling our fun…
 |
| Yep having a dry area to work in is always a bonus |
 |
| The head door also gets some TLC. |
Leaky faucets or rusty fixtures are certainly not the aesthetics you want in your head. If a plumbing issue is not addressed in time, it can lead to rotten timber in joinery or in the substructures of your floor. A minuscule leak may not even be visible but if the water pump looses pressure occasionally or the bilge pump goes off every now and then, it's time to start checking over all your water lines and fittings. Tracking these tiny, hard to find leaks can be a nightmare. One trick we learnt along the way was to use teabags taped under fittings suspected to be but not obviously leaking. If the teabag is wet in a couple of days you have found the problem spot. Fortunately we had no real issues in this area and were able to just give everything a good deep clean. To clean up the door hinges, stainless items and tapware, we used a combination of baking soda and vinegar. With a scouring pad we gently worked the years of corrosion, dirt and scum away. We then popped them into a bag containing olive oil and vinegar until required for refitting. We swear by this simple combination of vinegar and olive oil for keeping stainless-steel nice and shiny once it's clean.
A head is a room that gets that high traffic so you want materials that will last. The doors and timber trims were taped to avoid paint ingression onto the bare timber surrounds. The first coat of waterproofing, primer and sealer was applied using a soft brush and let to dry for a good 12 hours. We know the tin says you can re-coat in 3 hours but, like everything about sailing, that depends on the weather ….. After a steamy, humid 12 hours, we declared that the undercoat was ready for another coat, after a sand with 240 grit that is …. Yes the tin said no sanding required but this is a high traffic, high wear area so, for us, overkill is just barely enough, … after a good sand of 240 grit we reapplied the second coat of AquaBlock. (All product links are provided at the end of the blog.)
Once the second coat dried after a few wines, beers, a movie and a good night's sleep, we sanded again. Now that we were at the topcoat stage we had some choices. There are a number of products on the market and it really depends on the final finish you wish to achieve. In our case our head is the moulded underside of the cockpit. It is not a perfectly smooth finish. With a roller it wasn’t penetrating the surface and we were ending up with that crumbly sprayed texture ceiling look of the 1980’s … Yuk. Our beautiful lady may have been built in the early 80's but that's not look we were after. We opted for three coats of a crisp, clean white, semi gloss bathroom paint applied by brush. Sanded in between each coat of course.
The timber door, trim on the cabinet doors, shower grate and grab rail were sanded and coated in Cabot’s CFP satin finish. The satin finish looks brilliant, just like modern production boats. It is also not as slippery as the gloss that was previously coated on the shower grate, so hopefully no more foot lose moments. This product also says no sanding is required… Wrong! A light sand 240 grit really does improve the look and feel of the finished result and hopefully will also make it even more durable.
We could go on and on about how the finish of each coat appeared, how we sanded till it was as smooth as a baby's butt etc …. but now let’s skip right to the fun part…
Decorating…
To transform our head (bathroom) into one that would fulfil Karen's desired home magazine worthy look and still making it a totally functional part of our transportable home, was not the easiest. That beautiful, but flimsy three rung towel rail that looked so good in the display room had to be left there in favour of a more functional item. Trying to find functional beauty tested Karen. She poured over online catalogues trying to find the right designer look with the strength and durability required to stand up to the harsh elements onboard Our Dreamtime. We chose a very strong grab rail / towel rail combination unit which will stand up to our needs. With the boat heeling under sail in lumpy seas and your pants are around your ankles, you have to have confidence that your hand holds aren't going to tear off the wall. and land you in the shit - literally.
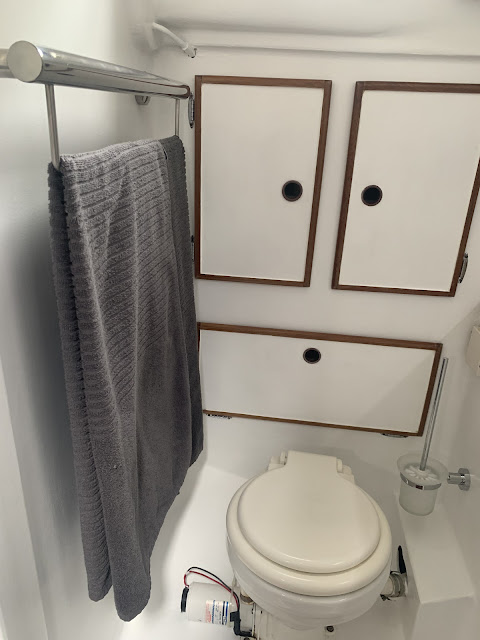 |
| The combination of strength and good looks are sometimes hard to find but our combination grab/towel rail has plenty of both. |
One of Karen's truly great finds was the tiles. Exactly, tiles on a boat? Well these have the look and feel of tiles but no weight, grouting or movement issues. Karen found “Stick on Luxury” products when we were converting our Renault van into our land yacht. (Campervan - see that story HERE). With the van being even more weight sensitive than the yacht, these were the perfect option. We were so impressed with them on that project we immediately ordered some more for the head refurbishment. Again we were very pleased with the application. Our Dreamtime’s head has curved walls and at no time were we ever going to be able use real ceramic tiles. Following the directions provided, the Stick on Luxury vinyl sheets were a great solution and a very easy product to use.
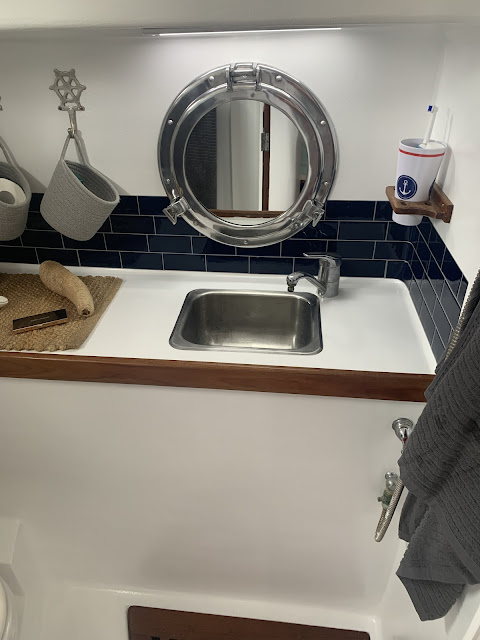 |
| We are extremely happy with this faux tiling system and highly recommend it |
Karen found the nautical inspired hooks securing the soft rope baskets in the head, at our local IGA over a year ago, purchased a placed aside for this very day. Gone are the days of chasing the toilet brush around the floor. Finally we have found the correct sized brush in a wall holder, perfection. Gone to is the round plastic mirror and in it’s place we fitted a gorgeous porthole mirror which unquestionably completed the magazine look.
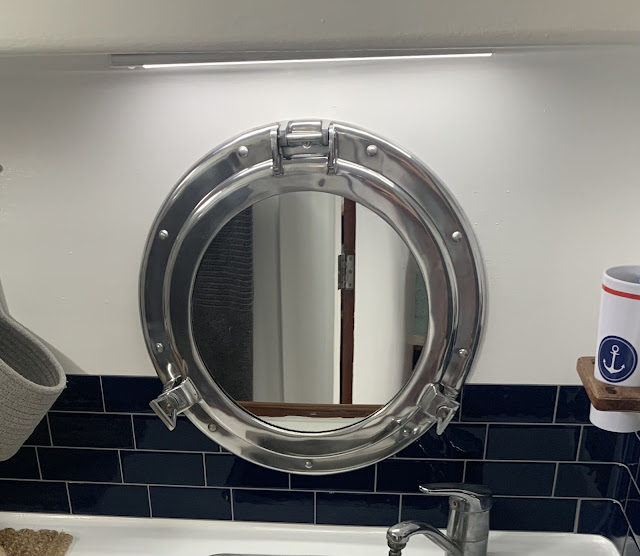 |
| Karen loves the porthole mirror which she feels completes "the look" |
When all was completed and refitted, we were very happy with the final look and functionality achieved by the refurb. We think it looks nice, bright and fresh. Please make sure you let us know what you think of it in the comments section.
Karen was actually so enthused by the results she wanted to start on the forward head straight away but it can wait until after we head off on our first big Land Yacht excursion to Tasmania ahead of the next northern sailing season.
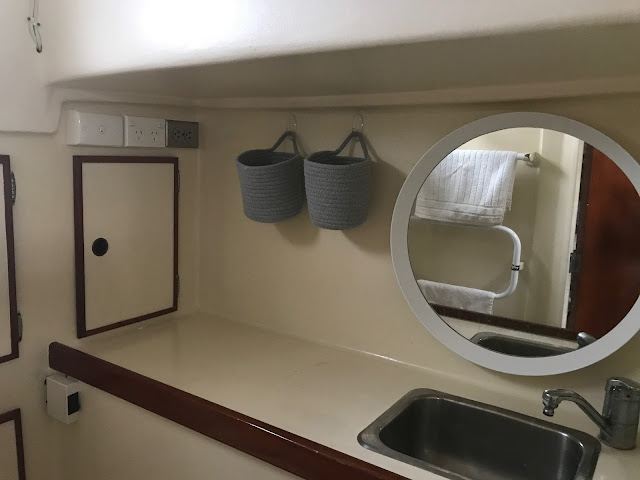 |
| Before |
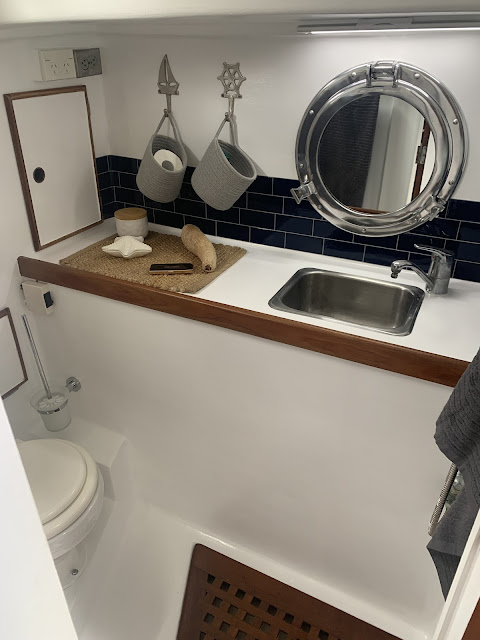 |
| After |
All of the products we used are listed below. We do have an association with some of these links. If you purchase though them we will receive a small commission and in most cases you will receive a discount as well. We love a win - win. Retailers may change their links and we endeavour to keep them up to date but apologise if any do not work at the time you visit. Cheers!
Porthole mirror - https://amzn.to/3eHnyGU
Toilet brush holder - https://amzn.to/32VPOTv
Grab rail towel rail combo - https://amzn.to/3sPFOpy
Solar powered exhaust fan - https://amzn.to/3FUyflk
Stainless Steel Sink - https://amzn.to/31o2Rwx
Tap - https://amzn.to/3zpftzX
Tiles - https://stickonluxury.com.au/?ref=dreamtimesail
Paint - waterproofing/primer - https://www.bunnings.com.au/crommelin-1l-flat-aquablock
Paint - topcoat - https://www.bunnings.com.au/dulux-4l-interior-paint-wash-wear-plus-kitchen-bathroom-semi-gloss-vivid-white_p1370132
Timber varnish - https://www.bunnings.com.au/cabot-s-1l-satin-water-based-cfp-floor_p1520276
Hooks - local IGA
Canister - Kmart
Natural Mat - Kmart
Starfish - Spotlight
No comments:
Post a Comment
We love to read your comments regarding our blog, what you enjoyed and what you might like to see more of. Please leave us your thoughts.